The following steps detail how to create a basic Aura form, utilizing Aura as it has been designed out of the box. This tool is ideal for users with little or no programming and web development training.
For a more detailed review of each tab and section, including character limitations, please refer to the “Detailed Review of each Aura Tab and Field” and the “Aura Customization” sections of this guide.
Each tab contains the fields associated with that particular portion of the Aura form.
| 1. | To create an Aura Form log into our website www.uk.iatspayments.com and click on the “Aura Form Setup” tab. |
| 2. | To create a new donation form first click the New Form button, or select an existing form from the “Select Event” pick list and click the Copy Form button. This option will clone the existing form, and add [Copy] to the Name field. |
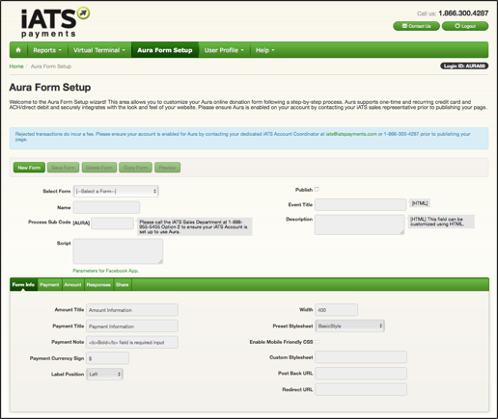
| 3. | Name the Aura form. This name will only be displayed internally, and not displayed on the final Aura page. |
| 4. | If you have created a copied Aura Form via the Copy Form button, double check the Process Sub Code field and modify the iATS Merchant account sub-code if needed. |
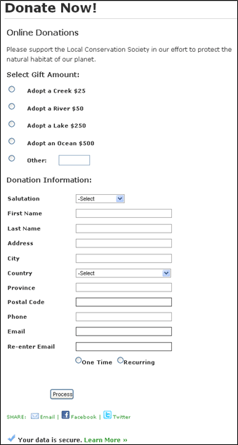
| 5. | Enter a Title and add information to the Description field. Refer to the image below to view how these fields will display on the Aura form. Note: Fields marked with [HTML] indicate that HTML coding can be used in these fields. Please use single quotes in place of double quotes. |
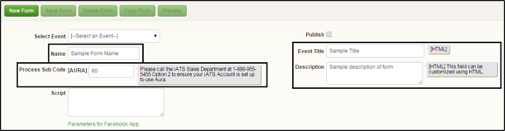
| 6. | In the Process Sub Code box, enter the online sub code digits which were provided by iATS Customer Care. This online code should end in the numbers 80 through 89. |
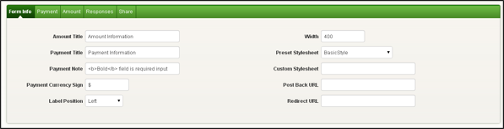
| 7. | While still on the Form Info tab, edit the section titles and width of the form if desired. |
| 8. | To mimic the look and feel of the existing webpage which will host the Aura donation form, add a Custom Style Sheet (CSS) into the Custom Style Sheet field. This step is optional, however if not used the content of the form will be displayed with a white background. If desired, a generic iATS created style sheet can be selected from the “Select Style Sheet” drop down box. Note: “Basic Style” is the standard plain style sheet. If desired, a generic style sheet can be selected, and used in conjunction with your own Custom Style Sheet. The CSS will override the “Select Style Sheet” option. |
| 9. | To allow information to post to our Salesforce Application Brickwork or alternate CRM third party software, add a Post Back URL. For more information on how Aura connects with Brickwork, please contact iATS Customer Care. |
| 10. | To direct the user to an alternate website once the transaction has been completed, add a Redirect URL. This will fire after 3 seconds once a transaction is approved. If a transaction is rejected, the donor will not be re-directed. |
| 11. | Click on the Payment tab. |
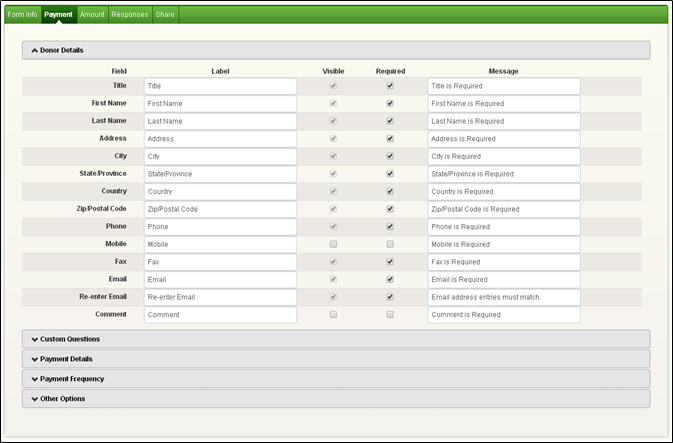
| 12. | The Payment Tab comprises five sections which can be customized if desired (Donor Details, Custom Questions, Payment Details, Payment Frequency, and Other Options). |
| 13. | Within the Donor Details section, add or remove a checkmark in the “Visible” and “Required” checkboxes to customize the visibility and requirement of each field. |
| 14. | If desired, the Label and Message field text can be modified to allow for additional customization. |
| 15. | The Custom Questions section allows you to gather data from your donor. A text box will appear to the donor by default, however if radial buttons are needed for the response, add a checkmark to the Enable Select option, and type the applicable answer options separated with an enter key. |
| 16. | If additional space is needed to describe the question, click the More Info button on the right side of the item. Text entered here will appear as a question mark beside the question on the donation form. |

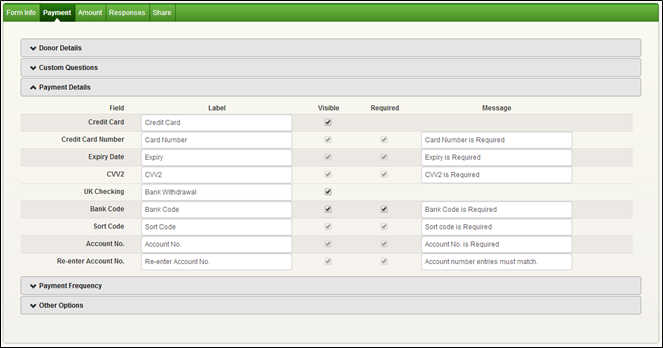
| 17. | Expand the Payment Details section to choose the methods of payment and payment schedule options for your form including Credit Card, UK Direct Debit, and Euro SEPA services. Note: if using our UK Direct Debit option, please add your Organizations contact email address, phone number, and SUN details to the Account Setup page within the User Profile tab (open in a new window so you don’t lose your progress on the Aura form.) |
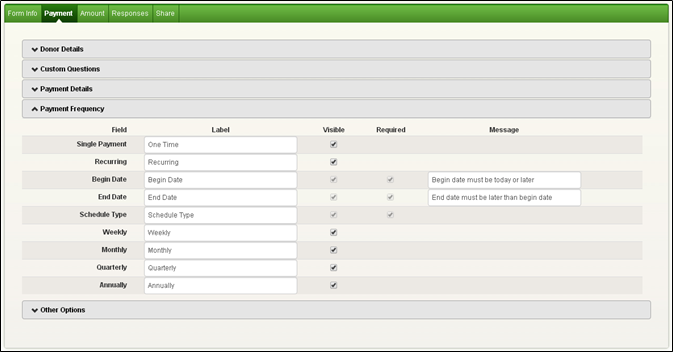
| 18. | Expand the Payment Frequency section to add or remove the Single Payment and Recurring Payment options. If Recurring is enabled, different Schedule Types can be enabled or disabled as needed. |
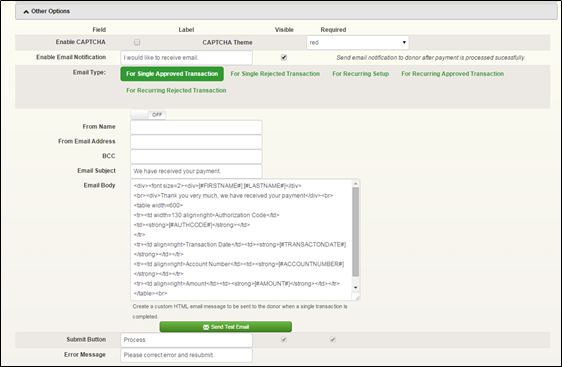
| 19. | Expand the Other Options section to enable the email notification tool, and Captcha. For more information on customizing the email notifications, please refer to the Aura Customization section. |
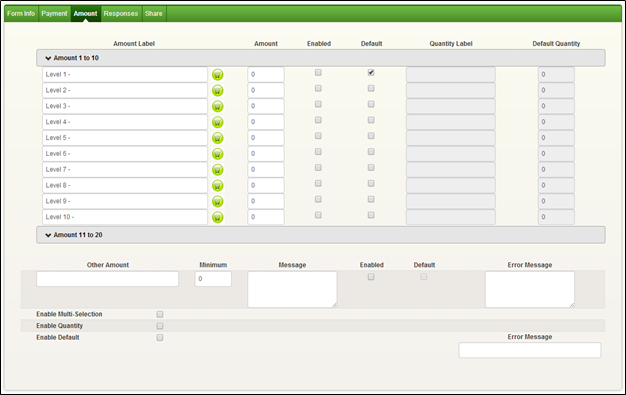
| 20. | Click on the Amount tab. |
| 21. | The Amount tab enables customization of the descriptions that appear beside the dollar amounts visible to the end user. To ensure visibility, checkmark the Enabled checkbox. To enable the user to enter a unique dollar amount, the Other Amount option can be enabled. |
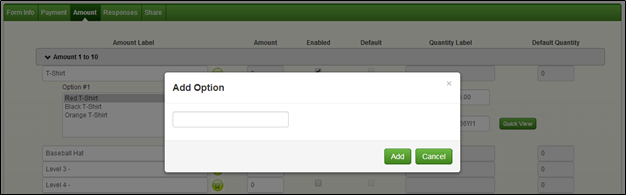
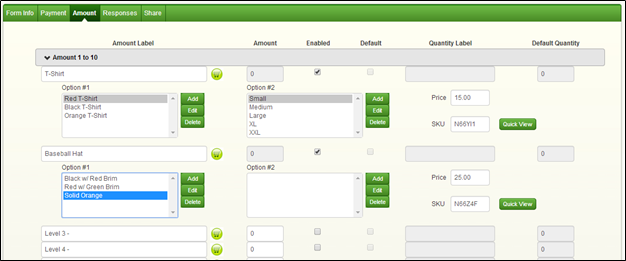
To enable our new Shopping Cart feature (new for Spring 2014), click the shopping cart icon beside one of the 20 payment levels. The Enable Multi-Selection and Enable Quantity options will automatically be selected. Within the Shopping Cart pop up options, you can add up to 20 Option 1 selections (such as Size), and up to 20 Option 2 selections (such as Color).
Please note: Each option has a 200 character limit, however longer labels may require you to expand the Width of the form (field located on Form Info tab), and apply custom CSS styling to adjust the height of each option.
| 22. | Once each option is added, you can add a price. A new unique SKU will automatically be created, however you can change the SKU if needed. |
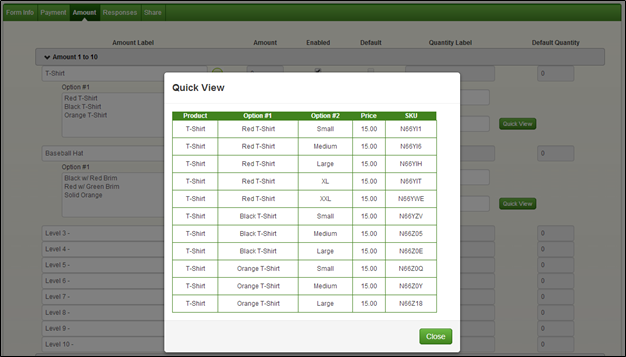
| 23. | Once finished, you can click the Quick View button to display a grid of all options and SKU’s. |
For more detailed information on setting up a shopping cart, please refer to the “Building a Shopping Cart” section of this user guide.
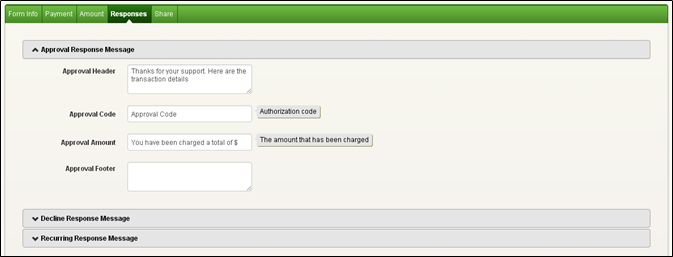
| 24. | Click on the Responses tab. |
| 25. | The Responses Tab comprises three sections which can be customized if desired (Approval Response Message, Decline Response Message, and Recurring Response Message). The Response tab allows customization of the response messages that are visible to the end user after a transaction has been attempted. |
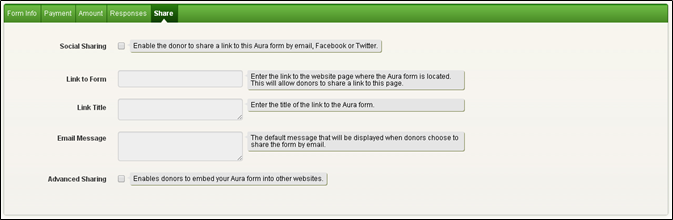
| 26. | Click on the Share tab. |
| 27. | The Share tab enables the Aura form to be shared or embedded in a variety of Social Media tools, and secondary websites. |
| 28. | Once all five tabs have been customized as needed, scroll to the top of the Aura Form Setup page, and click the Save Form button to generate the Script. Once saved, click the Preview button to view the Aura form. |
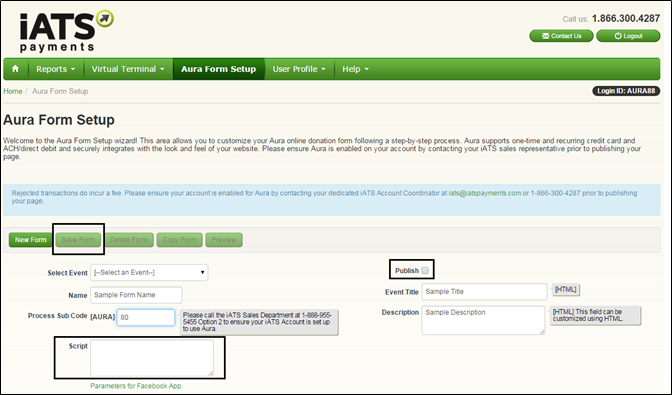
| 29. | Once satisfied with the Aura form, check the Publish checkmark box to activate the functionality of the form. This will enable the form to be used by the end user once embedded. |
| 30. | In order to embed the Aura form into your organization’s website, copy and paste the Script that was generated when the form was saved. This piece of coding should be embedded between any block-level HTML elements within the source code of your page. Ex: Paste between <body>…</body>, <td>…</td> etc. Note: The CAPTCHA security option may not work properly if the AURA script is embedded between <p> ...</p> block. |
* Multiple Aura forms cannot be embedded on the same webpage, even on different “tabs”.

.png?width=200&height=150&name=iATS%20by%20Deluxe_200x150%20(1).png "iATS by Deluxe_200x150 (1)")