If you would like to send personalized pre-filled donation forms to your members or consistent donors, you can easily do that with Aura using the Pre-populate Field setup. This method allows to attach all your donor's info to the form using a CSV. When your donors receive their personalized link, all they will have to do is add the credit card and process the payment, all the information can be pre-filled before sending the form out.
This is a 3-step process. Before we start customizing URL’s, please create the online form for your campaign using the Aura form setup section of the guide. Once your form/donation page is ready, you can start pre-populating the information.
Step 1: Creating the CSV
|
|
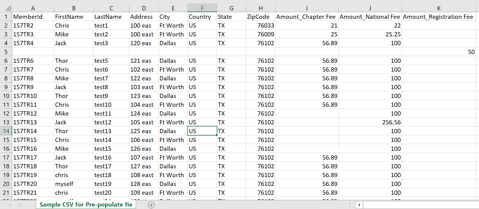
Attached is the Sample CSV showing the information required to import customer data.
|
|
|
Row 1 with the headers show the name of the fields in the Aura form that you would like to provide information for
|
Step 2: Uploading the CSV
| 1. |
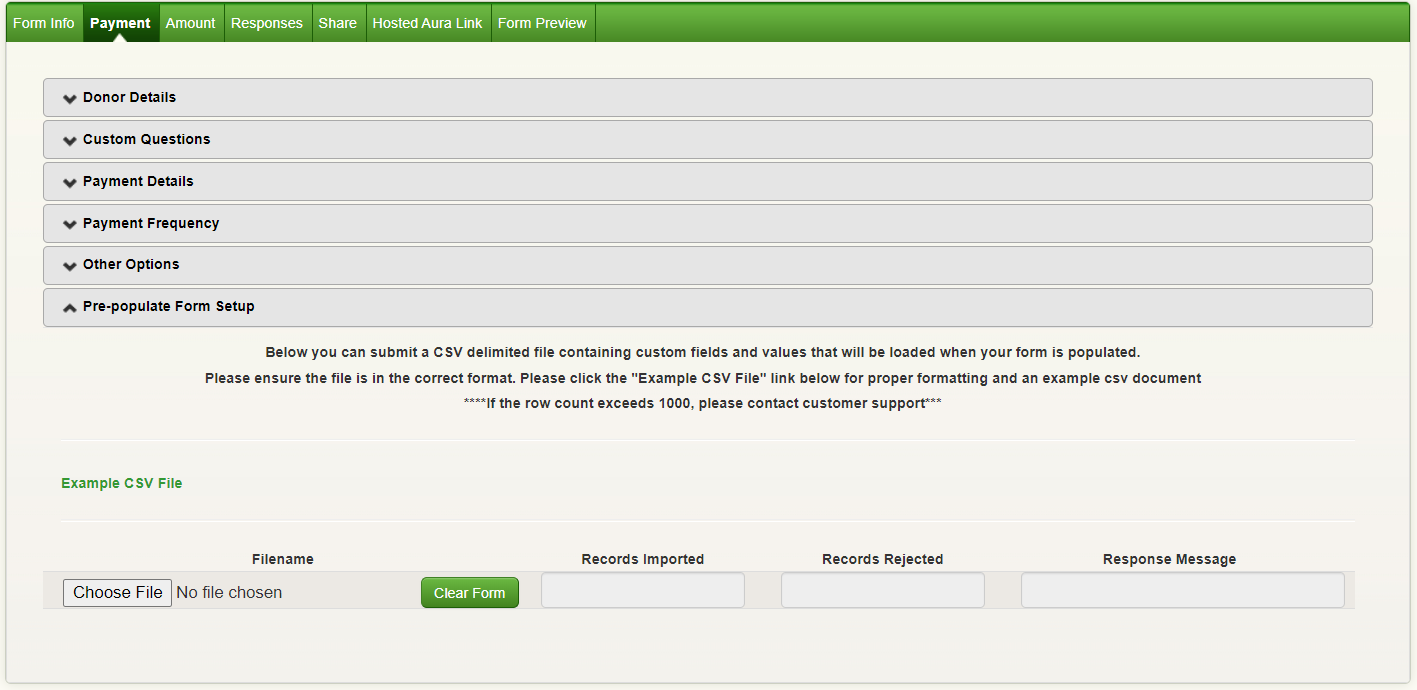
To upload the CSV, select the ‘Payments Tab’ and choose ‘Prepopulate Form Setup’ section.
|
| 2. |
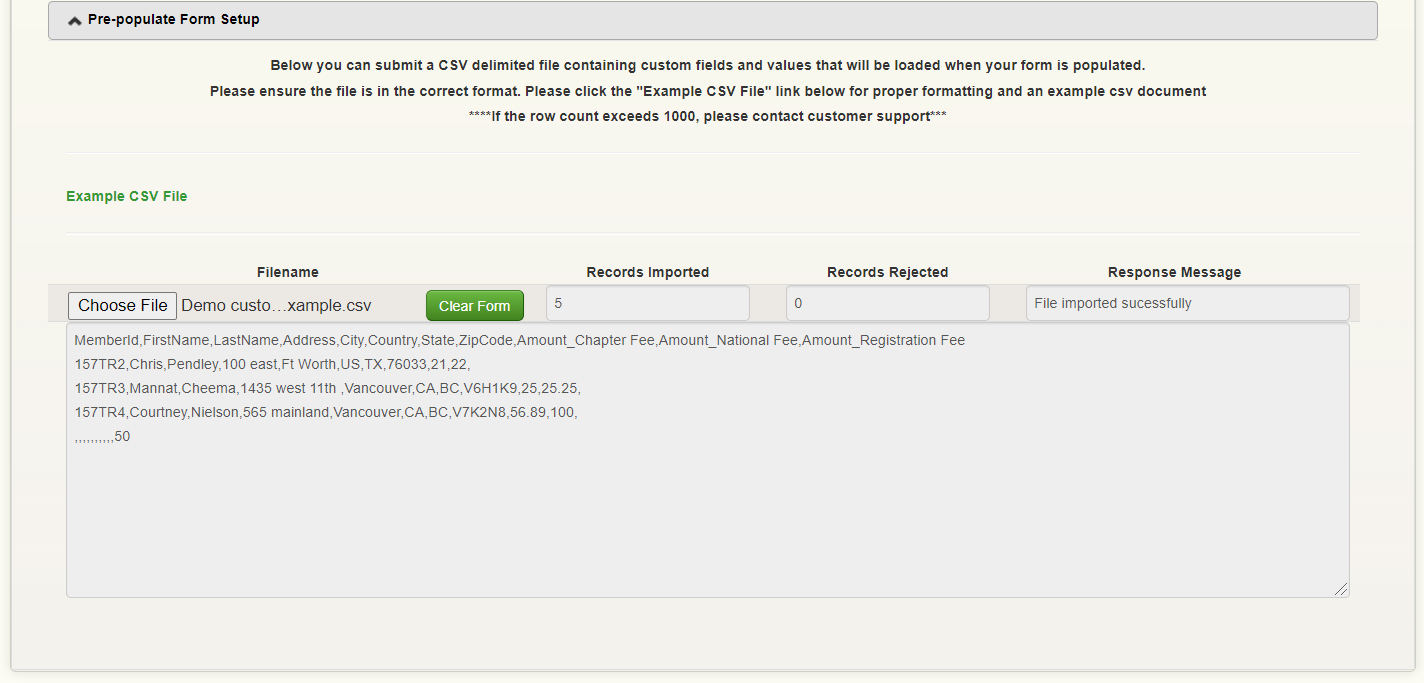
Once you upload the CSV, hit ‘save’ on the top left part of the setup page. The CSV section will fill with the information uploaded as follows:
|
Forms are now ready, and you can start sending out the customized URL’s. Here is how your customers will receive it:
|
|
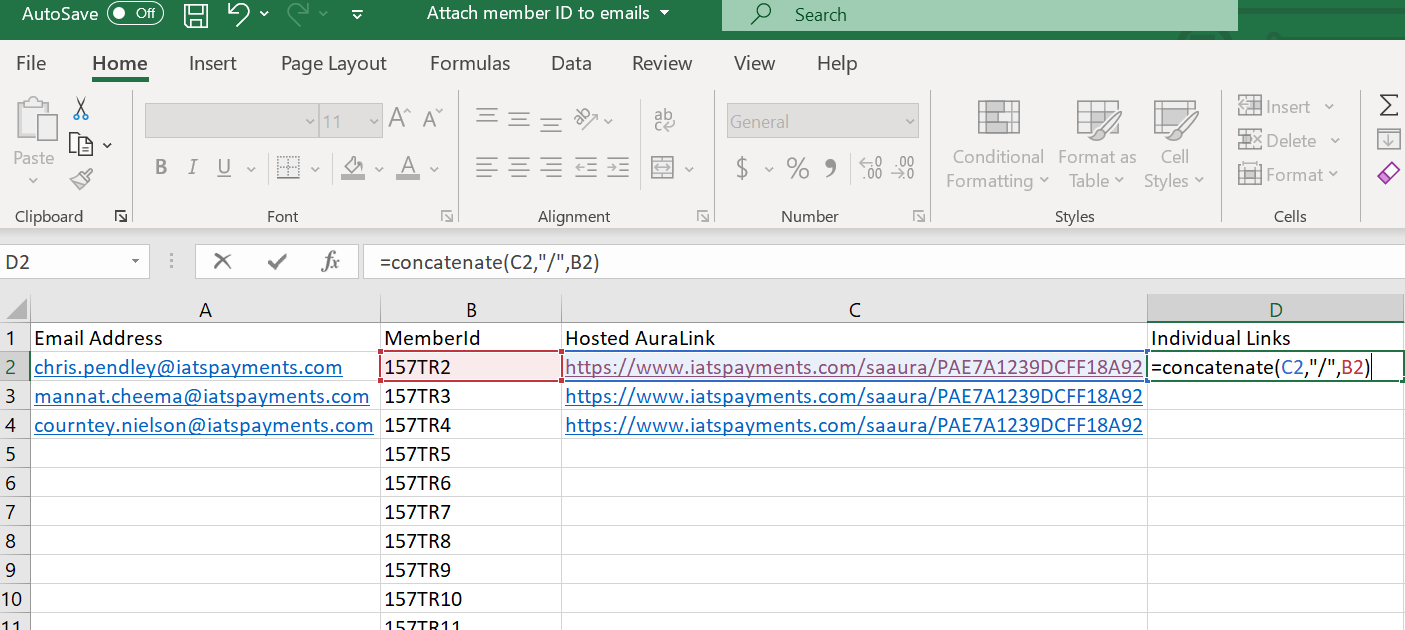
Their customized URL with identifier variable at the end of the URL. In our example case, this would be the Member ID. Sample URL https://www.iatspayments.com/saaura/PAE7A1239DCFF18A92/157TR2 |
|
|
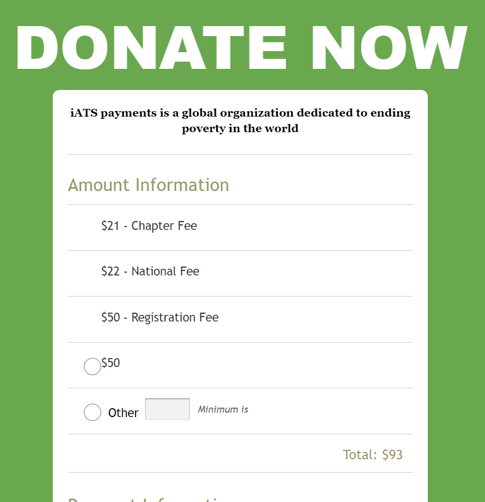
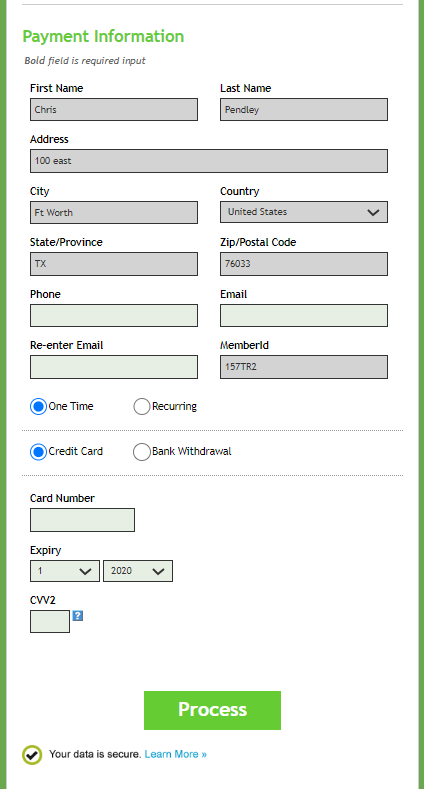
When your member receives the link, here is how it would look:
|
|
|
All they would have to do is add their payment details as the amounts are already predefined and can’t be changed and the personal information is pre-filled.
|
Step 3: Creating individual URL links for each member
Now that the CSV has been prepared and uploaded, next step is to send out emails to all your members with their unique URL link. To create the link, we recommend using excel and the concatenate function.
The image attached shows how to do so:
Here is a sample CSV you can use.
Once the links are generated you can upload this CSV to your email software and start sending out the links to your members.

.png?width=200&height=150&name=iATS%20by%20Deluxe_200x150%20(1).png "iATS by Deluxe_200x150 (1)")