Page Builder Setup and Support

Learn how to set up payment pages, change design settings, understand reporting and metrics, and dive into advanced features of Page Builder.

Social Media

social media 750x250

Social Media Sharing

Adding Social Media sharing & Facebook Like buttons to your page is a great way to exponentially multiply the number of people exposed to your cause. Choose from the major Social Media sites by selecting the checkbox for each one.

  1. When editing your page with the Payment Page Builder, navigate to the Design tab.
  2. Provide a custom URL to share: This option provides the flexibility to point traffic to any website, or Facebook page rather than to the donation/payment page. Fill in the entire URL, such as [http://www.yourdomain.com]. When using this option, keep in mind that Facebook will inspect your specified website page and determine the best manner in which to represent it by arbitrarily selecting an image and description. To control the Facebook selection process it's necessary to add Facebook Open Graph support to your website. See this link to learn how to control the image and description utilized by Facebook.
  3. Enter a description: This option is useful for when you do not wish to share an external URL, and would like to give a description about your payment page. Choose this option if you wish to point the traffic to the donation/payment page. Users who click on their friends' Newsfeed links or posts will be able to click directly to your donation/payment page. The description should be concise and explain the donation/payment page purpose and cause.
  4. Check the box next to each social media for which you'd like to enable sharing. Below is a description of each:
    • Facebook Like: Allow users to like your payment page on their Facebook page.
    • Facebook Send: Allow users to share this page on their Facebook wall and Newsfeed.
    • Google+: Allow users to share this page on their Google+ profile and Newsfeed.
    • Twitter: Allow users to tweet and share a link to your page.
    • LinkedIn: Allow users to share this page in their LinkedIn Newsfeed.
    • Blogger: Allow users to share a link to your page in their Blogger blog.
    • Email: Allow users to email a link to your page.
  5. Click Save or Save & Exit.

social-sharing

Facebook Application

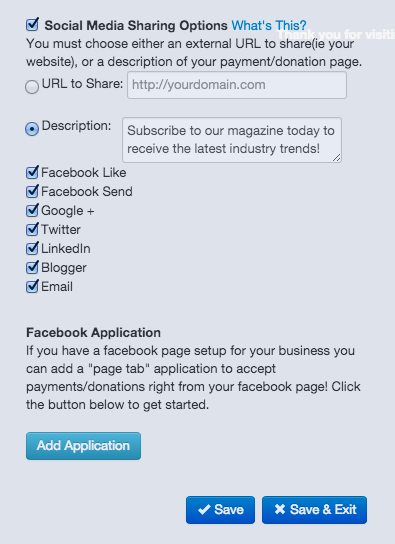
The Facebook application gives you the ability to add the donation or payment page as an application (or page) on your Facebook page. To set this up, follow these steps:

1. Click the blue Add Application button.
2. You will be prompted to log into your Facebook. Enter your login credentials and click Log In. If already logged in, continue to the next step.
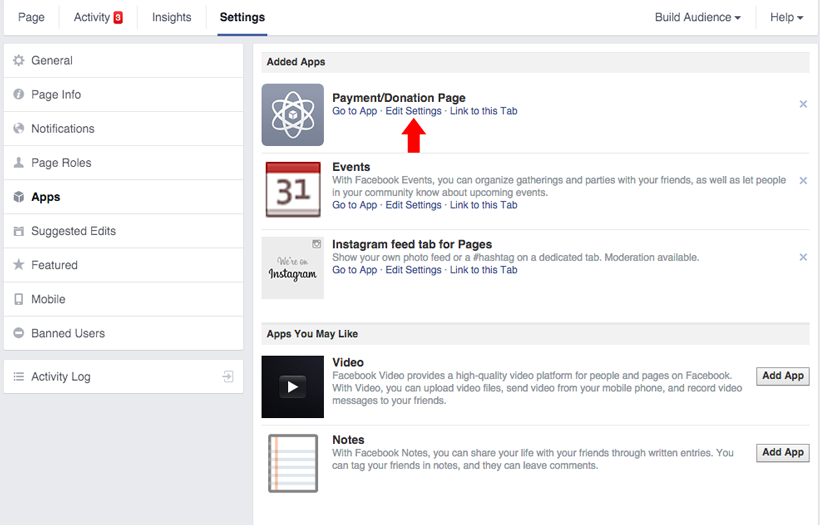
3. In the top navigation, select Settings.
4. In the left-hand navigation, click Apps.
5. Click Edit Settings under the Payment/Donation Page.

ppb-fbapp-edit-tab

6. Next to custom tab image, click Change.
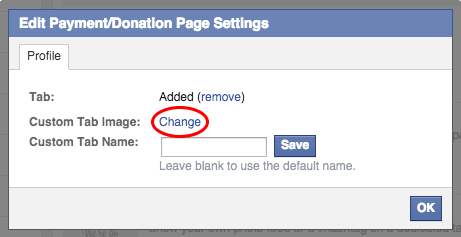
ppb-fbapp-change-pic

7. Click Browse to search for the image to be used. The file can be a JPG, GIF or PNG. If the image is larger than 111x74 pixels, it must be resized and converted. The file size must be 5MB or under. Select the image you'd like to use for the Payment Page Tab on your Facebook page.

You can display your payment page closer to the left hand side of the page under your cover photo by completing the following steps:
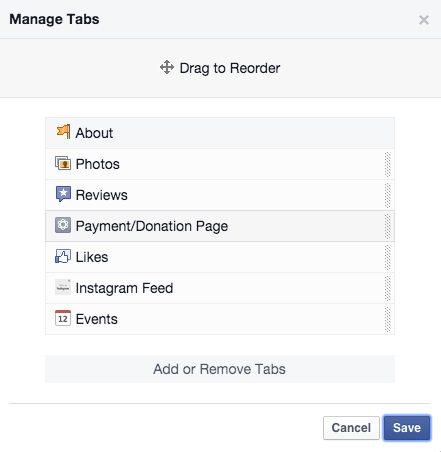
1. In the top menu on your Facebook page, click More, and select Manage Tabs.
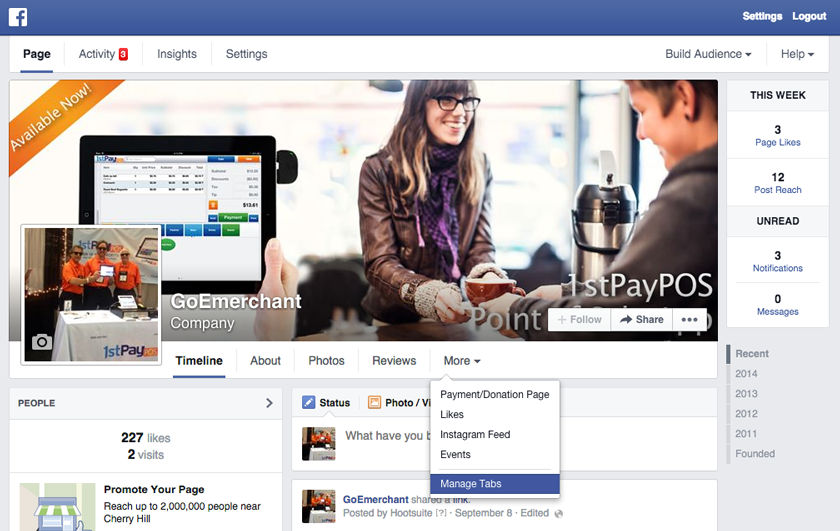
ppb-fbapp-manage-tabs-link

2. A window will appear that allows you to drag the order of tabs. Click your Payment/Donation Page App, and drag it to the position you'd like..
3. Click Save.

ppb-fbapp-manage-tabs

For more assistance with Facebook, please visit this page.

Making Your Page Live

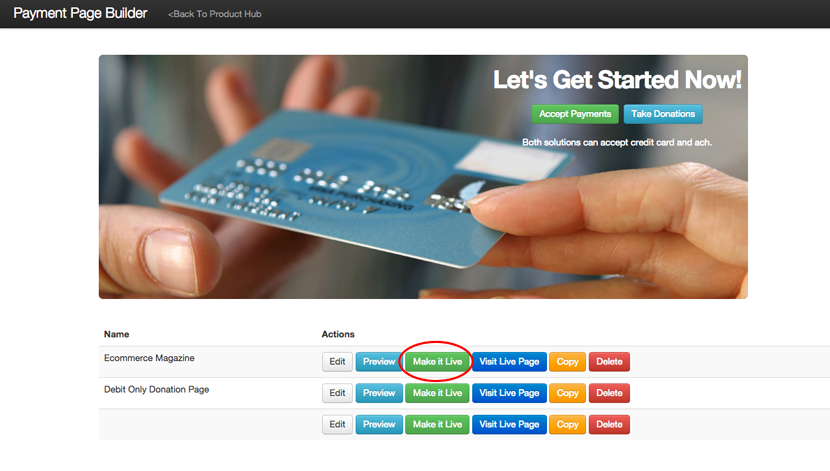
When you are finished making changes, you must manually put your page live so that your changes are visible to the public. To do so:

  1. Click Save & Exit at the bottom of your Payment Page editor. You may also click Go Back in the top navigation.
  2. You will see all of your payment pages listed below the banner image. Next to the one you'd like to make live, click Make it Live.
  3. Your changes are now live! You may click Visit Live Page to see the live page.
  4. You may continue editing your page at any time.

ppb-make-it-live

Contact us