Learn how to set up payment pages, change design settings, understand reporting and metrics, and dive into advanced features of Page Builder.

In the Transaction Center, you can view the details of a batch that has been submitted. To do this:
| 1. | Go to the Virtual Terminal menu in the top bar, and select View Batch Results |
| 2. | You will be presented with a search specific to batches. |
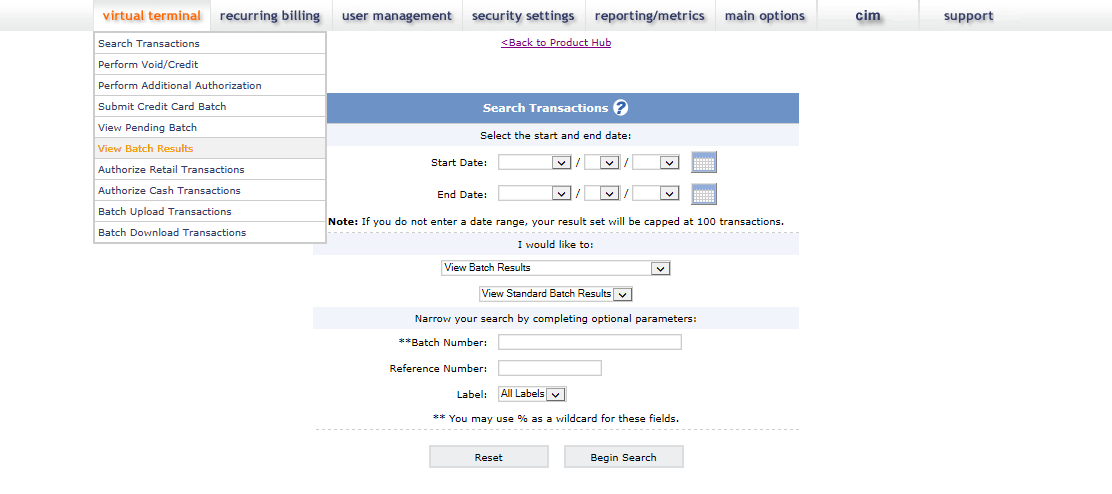
| Tip: Every search in the Transaction center has a section "I would like to:" and a dropdown menu of all the types of searches you can perform. If you click on the arrow on the right hand side you will see all the options. You can use this to quickly move between searches. |
| 3. | When you have filled out desired search criteria, click Begin Search |
| 4. | You will be presented with batches that match your search. They will be laid out by batch number with some general information about the batch. |
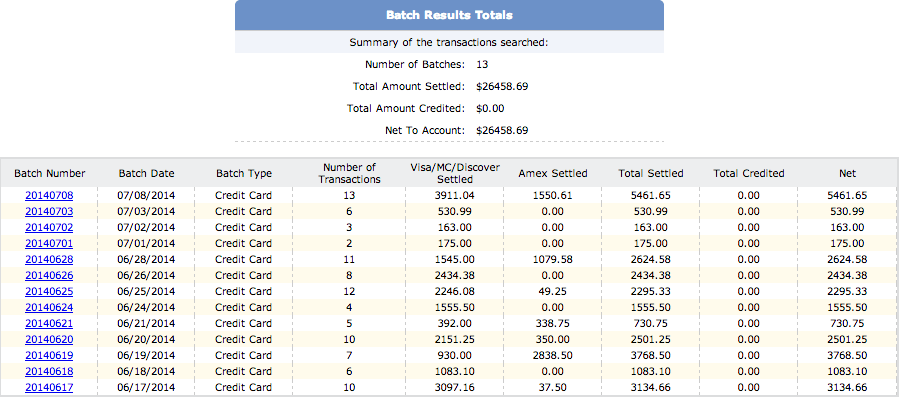
| 5. | Click on the batch number of the batch you'd like to view information for. This will lay out the transactions that were submitted in the batch, the total amount settled and credited, and the net to account. |
The 'Net To Account' should give you an idea of what will ultimately be deposited into your bank account. However, this may not be the exact amount depending on your client contract; Transaction Center's 'Net To Account' does not account for any fees that may be deducted before funds are deposited.
The transactions should look similar to when you run other searches in the Transaction Center. Since the transactions are in a batch that has already been submitted, you should see a "Yes" next to Settled or Credited, depending on what was done to the transaction. You should also be seeing "Settle" or "Credit" as the Transaction type. The other fields in a batch's details function the same way as other transaction center searches.
| Note: Once a transaction has been submitted via batch and settled, you can now expect to see the funds for that transaction hit your account. There is no true ETA for when funds from a batch hit a merchant account; a reasonable estimate would be 1-5 days from settlement. It is ultimately the responsibility of your bank processor to deposit the funds into your account. 1STPAYGATEWAY DOES NOT DO THIS! |
| 1. | Log in to the transaction center |
| 2. | Go to Virtual Terminal > Submit Batch |
| 3. | Leave all search criteria blank, and click the Begin Search button |
| 4. | A new screen will show, listing all transactions that have been authorized but not settled. Click on the check box next to each transaction listed, and click the Submit for Settlement button at the bottom of the screen. |
| TIP: You can settle a transaction for less than the amount authorized. When viewing the list of transactions available for settlement, you will notice a column on the right-hand side that says Settlement Amount; you may change this amount to be anything up to the amount authorized. You cannot settle a transaction for more than the authorized amount, but you can issue an additional authorization for the added amount you wish to charge. | |
| 5. | If there are more than 20 transactions available for settlement, you will be shown the next page of transactions available for settlement. Repeat the step above as needed to settle all authorizations. |
| NOTE: If an authorization is older than 21 days, you will not be able to settle the authorization. See Expired Authorizations for information on how to settle these transactions. |
|
| 6. | Transactions marked for settlement are placed in a batch file that is sent to the processing bank between 1 - 3 AM Eastern Time. At this time, you will be sent an email giving a summary of the batch. You will not receive this email if you do not have your email address listed in the transaction center's general options. |
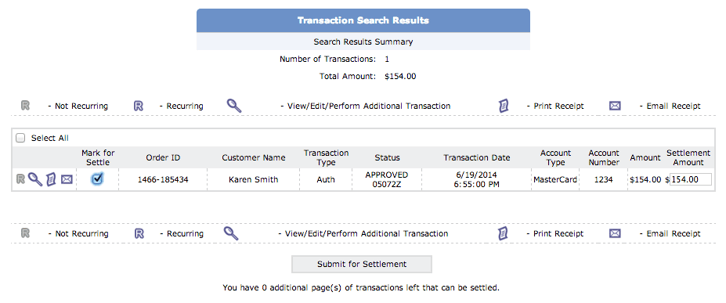
You can view all transactions you've marked to settle by going to Virtual Terminal > View Pending Batch. You will be shown a list of all transactions that are marked to settle and will be included in that batch.
You have two options when you are viewing transactions to be settled. You can either submit the transactions you've checked off to be settled, or you can skip the entire page and go to the next page. Note that if you click Skip to Next Page, none of the transactions you've marked will be submitted for settlement; they will be skipped over and not placed into the batch. You should only use the Skip to Next Page button if you are certain that you do not want to settle any transactions on the page displayed. If you would like to only settle a few transactions out of the ones listed, check only those transactions you wish to settle and click Submit for Settlement.
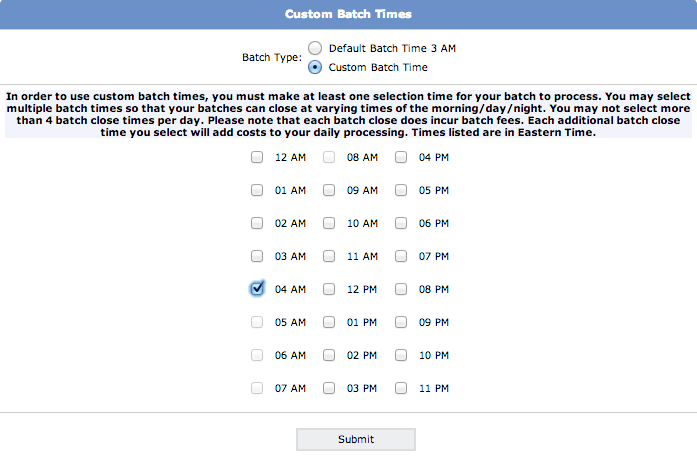
All clients have a default Batch time of 2 AM EST; this is when transactions are sent out for settlement. If this time conflicts with business hours (say, transactions come in after that time and the business doesn't close until later) then the client can set up to 4 custom batch times at a different time of day or night. You may only choose to batch on the hour (no 'odd' times) and you may not batch from 5AM-8AM EST. This is a processor restriction.
To set a custom batch time:
| Note: This affects the time transactions are sent out and therefore will affect the time funds are received. There is a fee for every time that a batch is submitted, no matter what! |
