
These settings are for those with some HTML and Javascript coding experience.
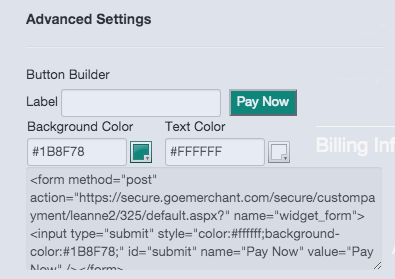
The advanced area allows you to select the code to use as a button builder to place into your existing website with the ability to change the button color. The HTML code can be copied and pasted to your existing site as an iframe or it can be linked.
If you'd like to add a button to your current website that links over to this payment page, you can configure it here.
You have the ability to embed your payment page into an existing website with an iframe. To do so, just copy the code in the HTML to embed this page in an existing site text area, and paste it into your website.
If you'd like to link the payment page to your website and wish to generate a set amount and order ID, additional fields can be added into the URL. This is useful if you've set up a payment page for a particular customer who owes a set amount, and you'd like to send them a custom URL for their payment. You simply add ?&amount=AMOUNT-OWED&order_id=ORDERID to the end of your page's URL. See below for an example:
If you have a customer named Mary Smith, and she would like to pay for an hour of your Consulting Firm's time, you can create a custom page for her, with her payment amount owed. If she owes $450.00, and the Order ID should be 12345, the URL would be:
https://secure. 1stpaygateway.net /secure/custompayment/consultingfirm/325/default.aspx?&amount=450.00&order_id=12345
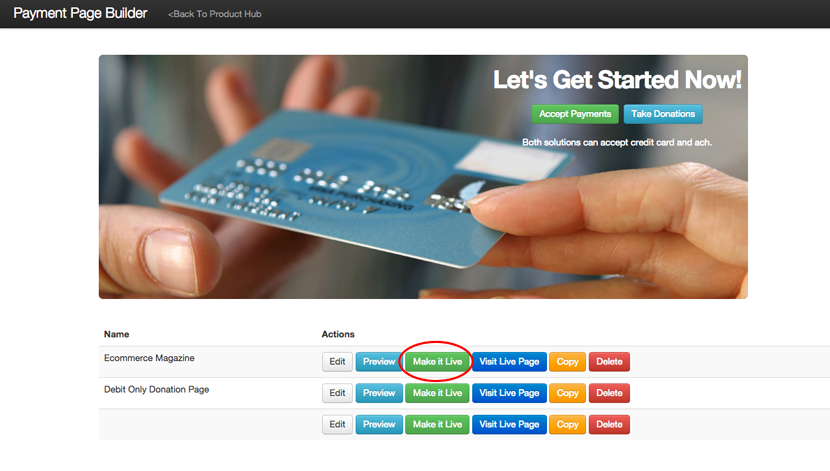
When you are finished making changes, you must manually put your page live so that your changes are visible to the public. To do so:

.png?width=200&height=150&name=iATS%20by%20Deluxe_200x150%20(1).png "iATS by Deluxe_200x150 (1)")